To program an android device, we typically need a Windows, Linux, or Mac computer and the android device both of which are connected via a USB cable.
To prepare an android device for development, we generally follow the steps below,
- Download and install the USB driver for the Android device on the host machine.
- Configure the Android device for development
For Nexus 7 tablet, following the general guideline, finish the steps below.
- Configure Nexus 7 tablet for development
- install the USB driver for the tablet
- Test the tablet
- Connection issue with Android 4.2.2 if you upgraded to version 4.2.2
Configure Nexus 7 tablet for development.
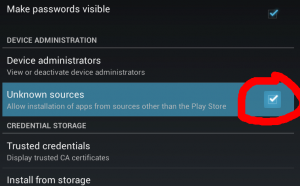
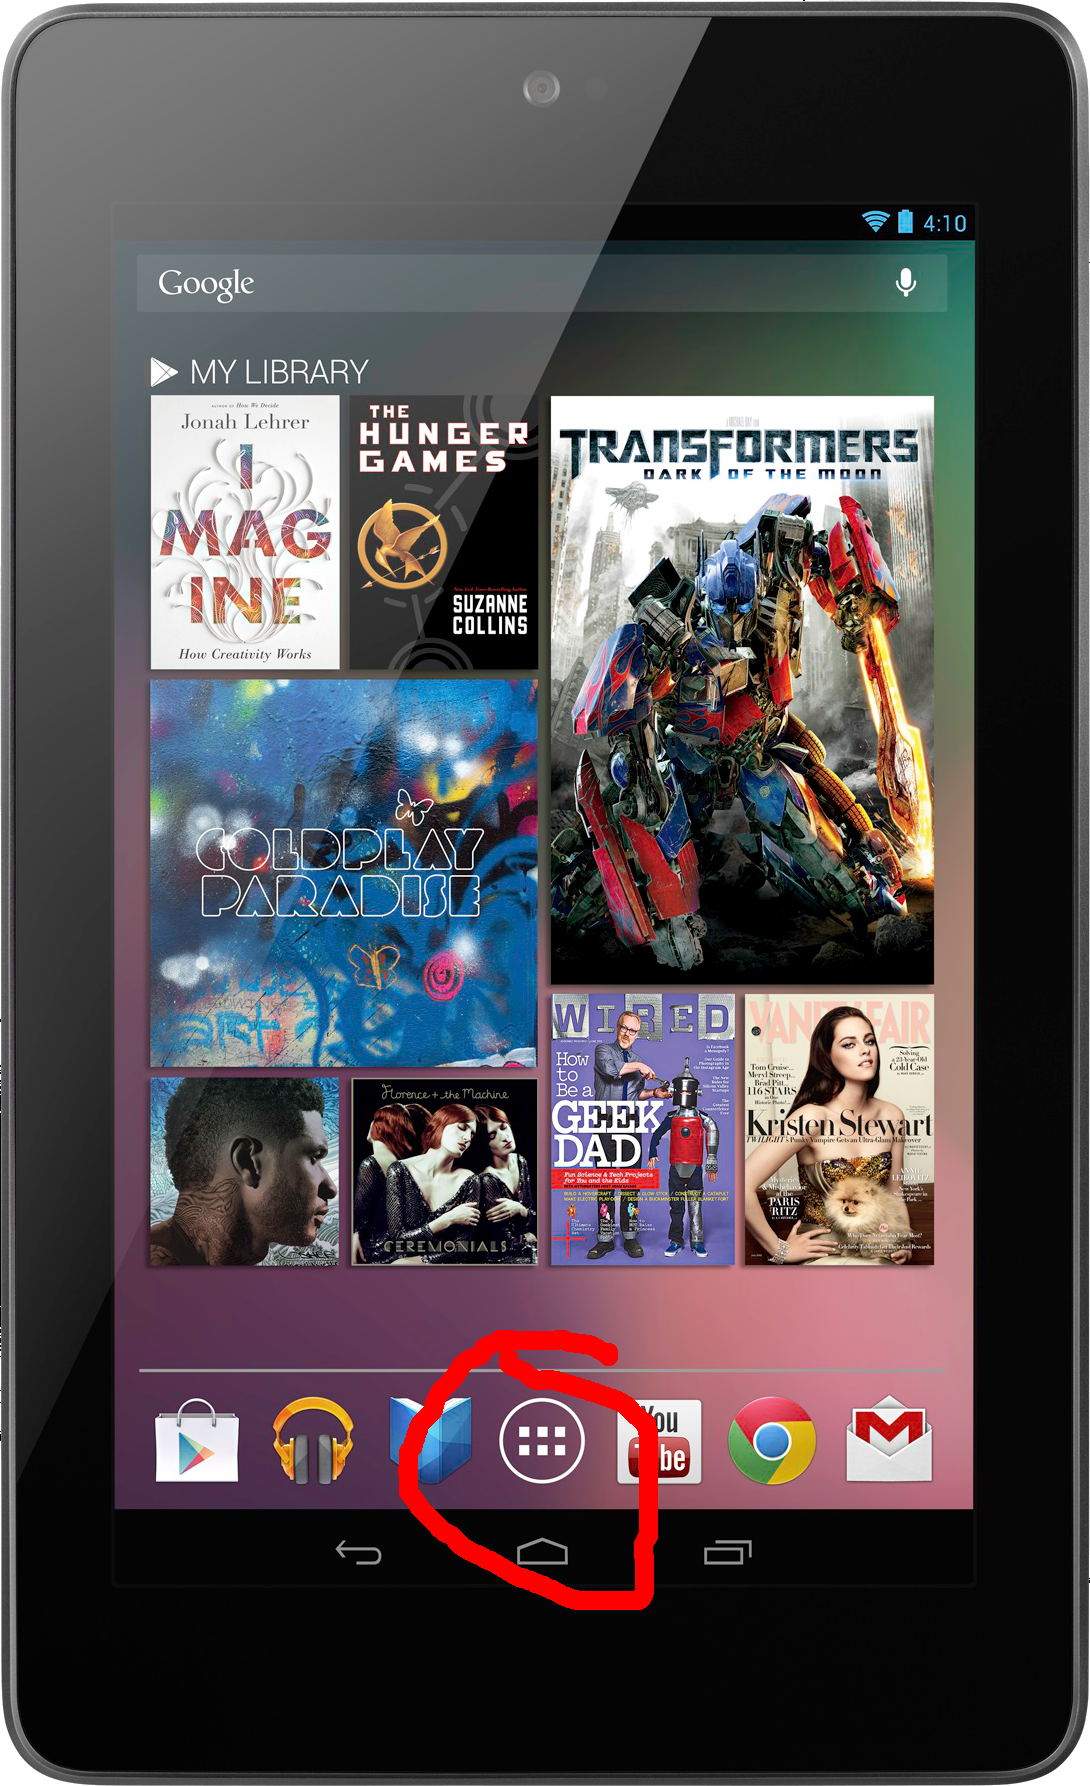
- Allow the tablet to install applications from unknown sources. Tap on “All Apps” icon and locate the “Settings” app. Locate “Unknown sources” and make sure that it is checked.

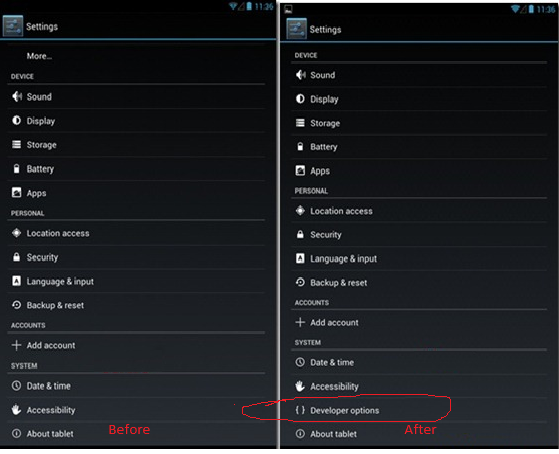
- Enable “Developer options” on the tablet. Tap on “All apps” icon and locate the “Settings” app. Tap on “About tablet” and locate “Builder number”. Tap on “Build number” seven times. As you taps, the tablet will state the number of taps you need to become a “developer”. After seven taps, the tablet will tell you that you have become a developer. If you tap again on the “build number” after you become a “developer” , it will tell you “No need, you are already become a developer”. Go back to the “Settings” app, you will now see the “Developer options” entry.
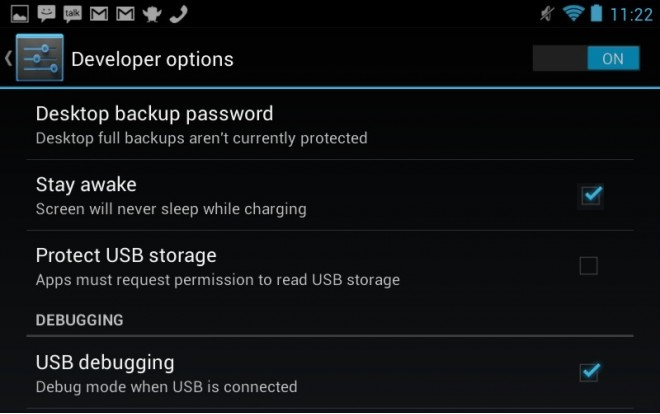
- Tap on the “Developer options” and check both “USB debugging” and “Stay awake”.

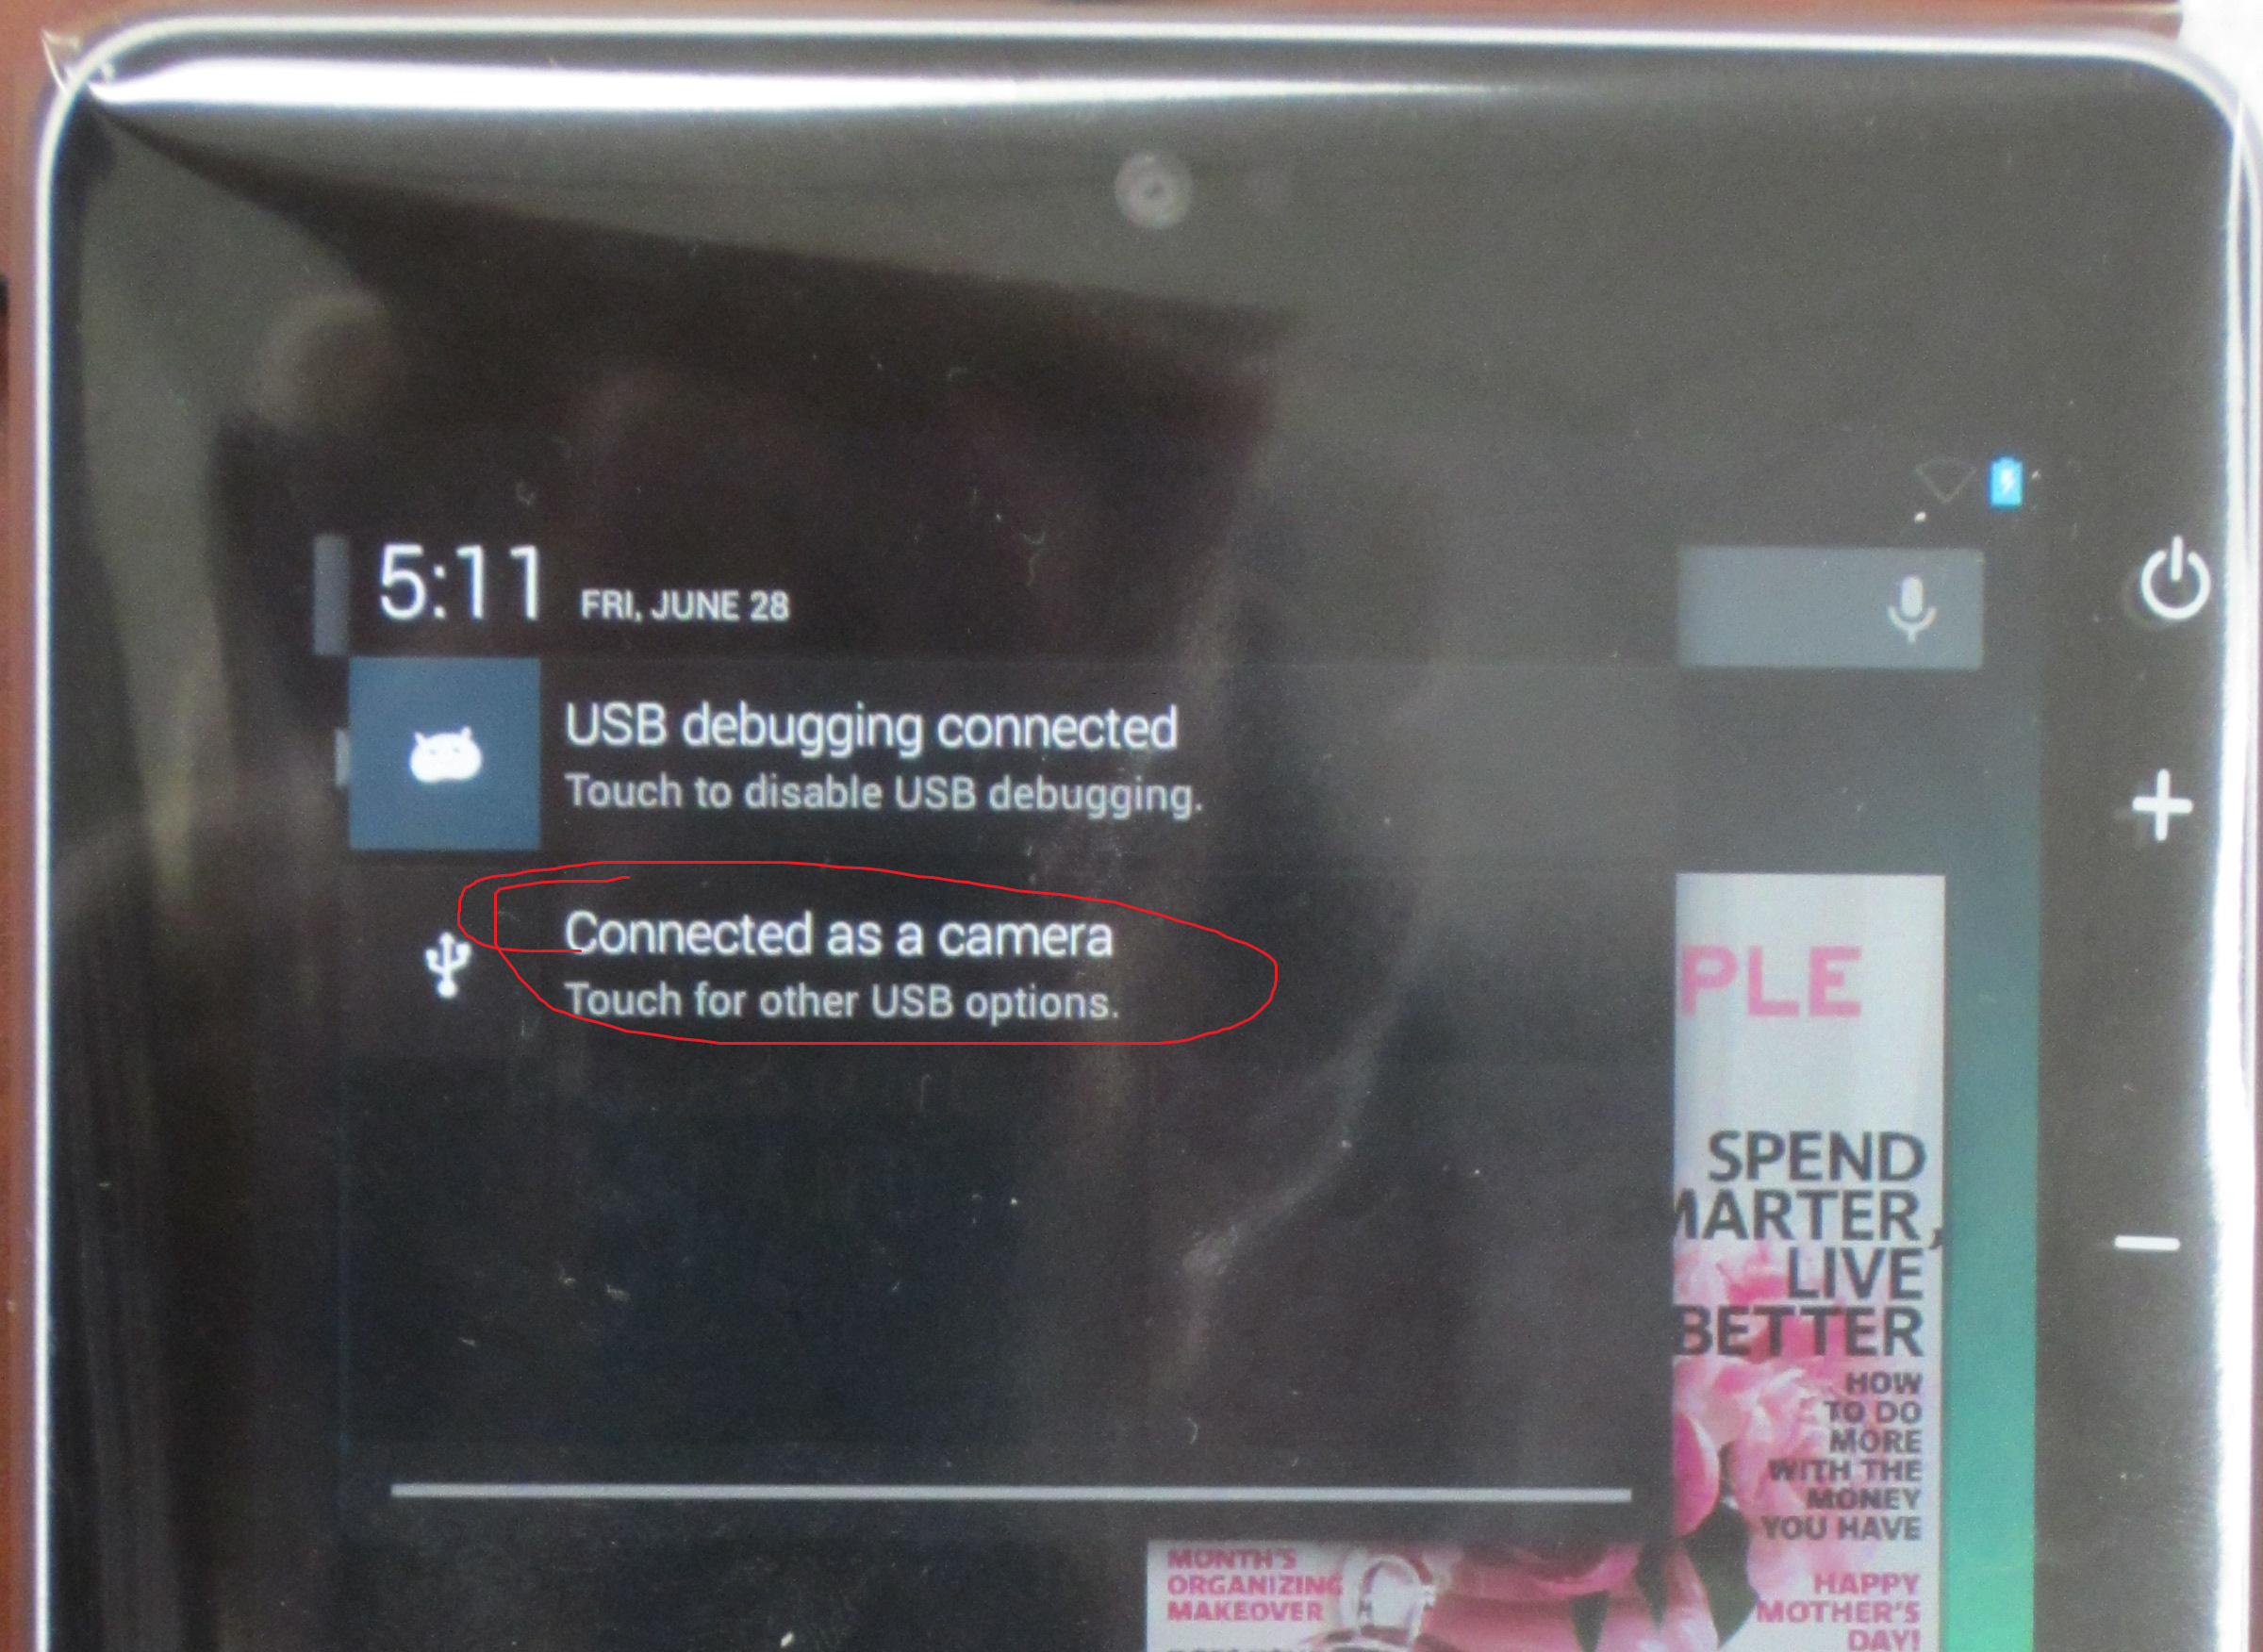
- Use your finger to swipe downward on the screen of the tablet from top. You should see current connection setup of the tablet. An example is given below.
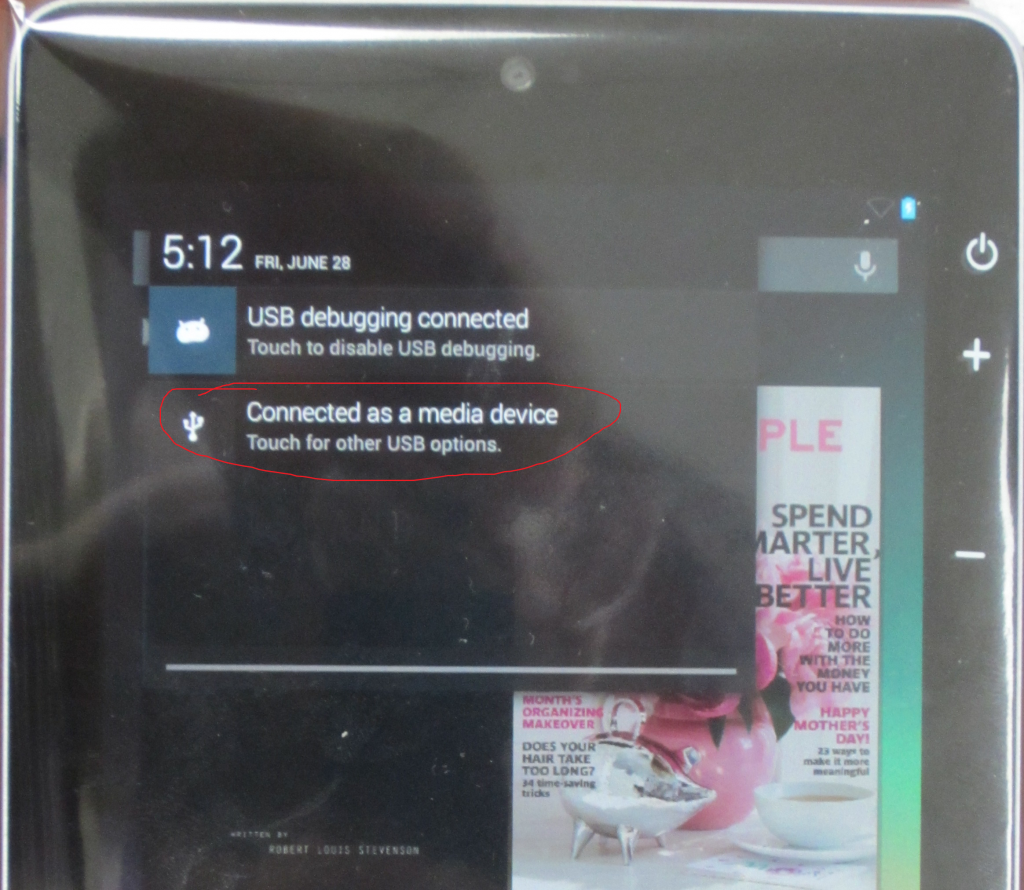
If the connection setting is “connected as media device”, you will not be able to connect to the device using App Inventor or Android Development Kit. You must change the setting to “connected as camera”.
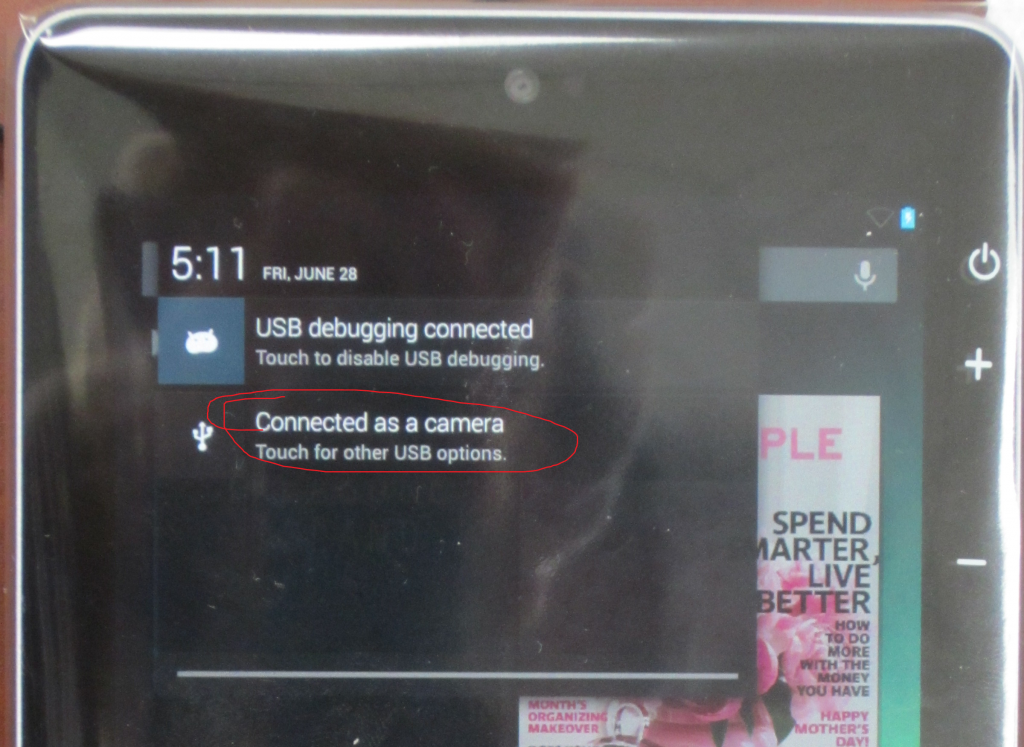
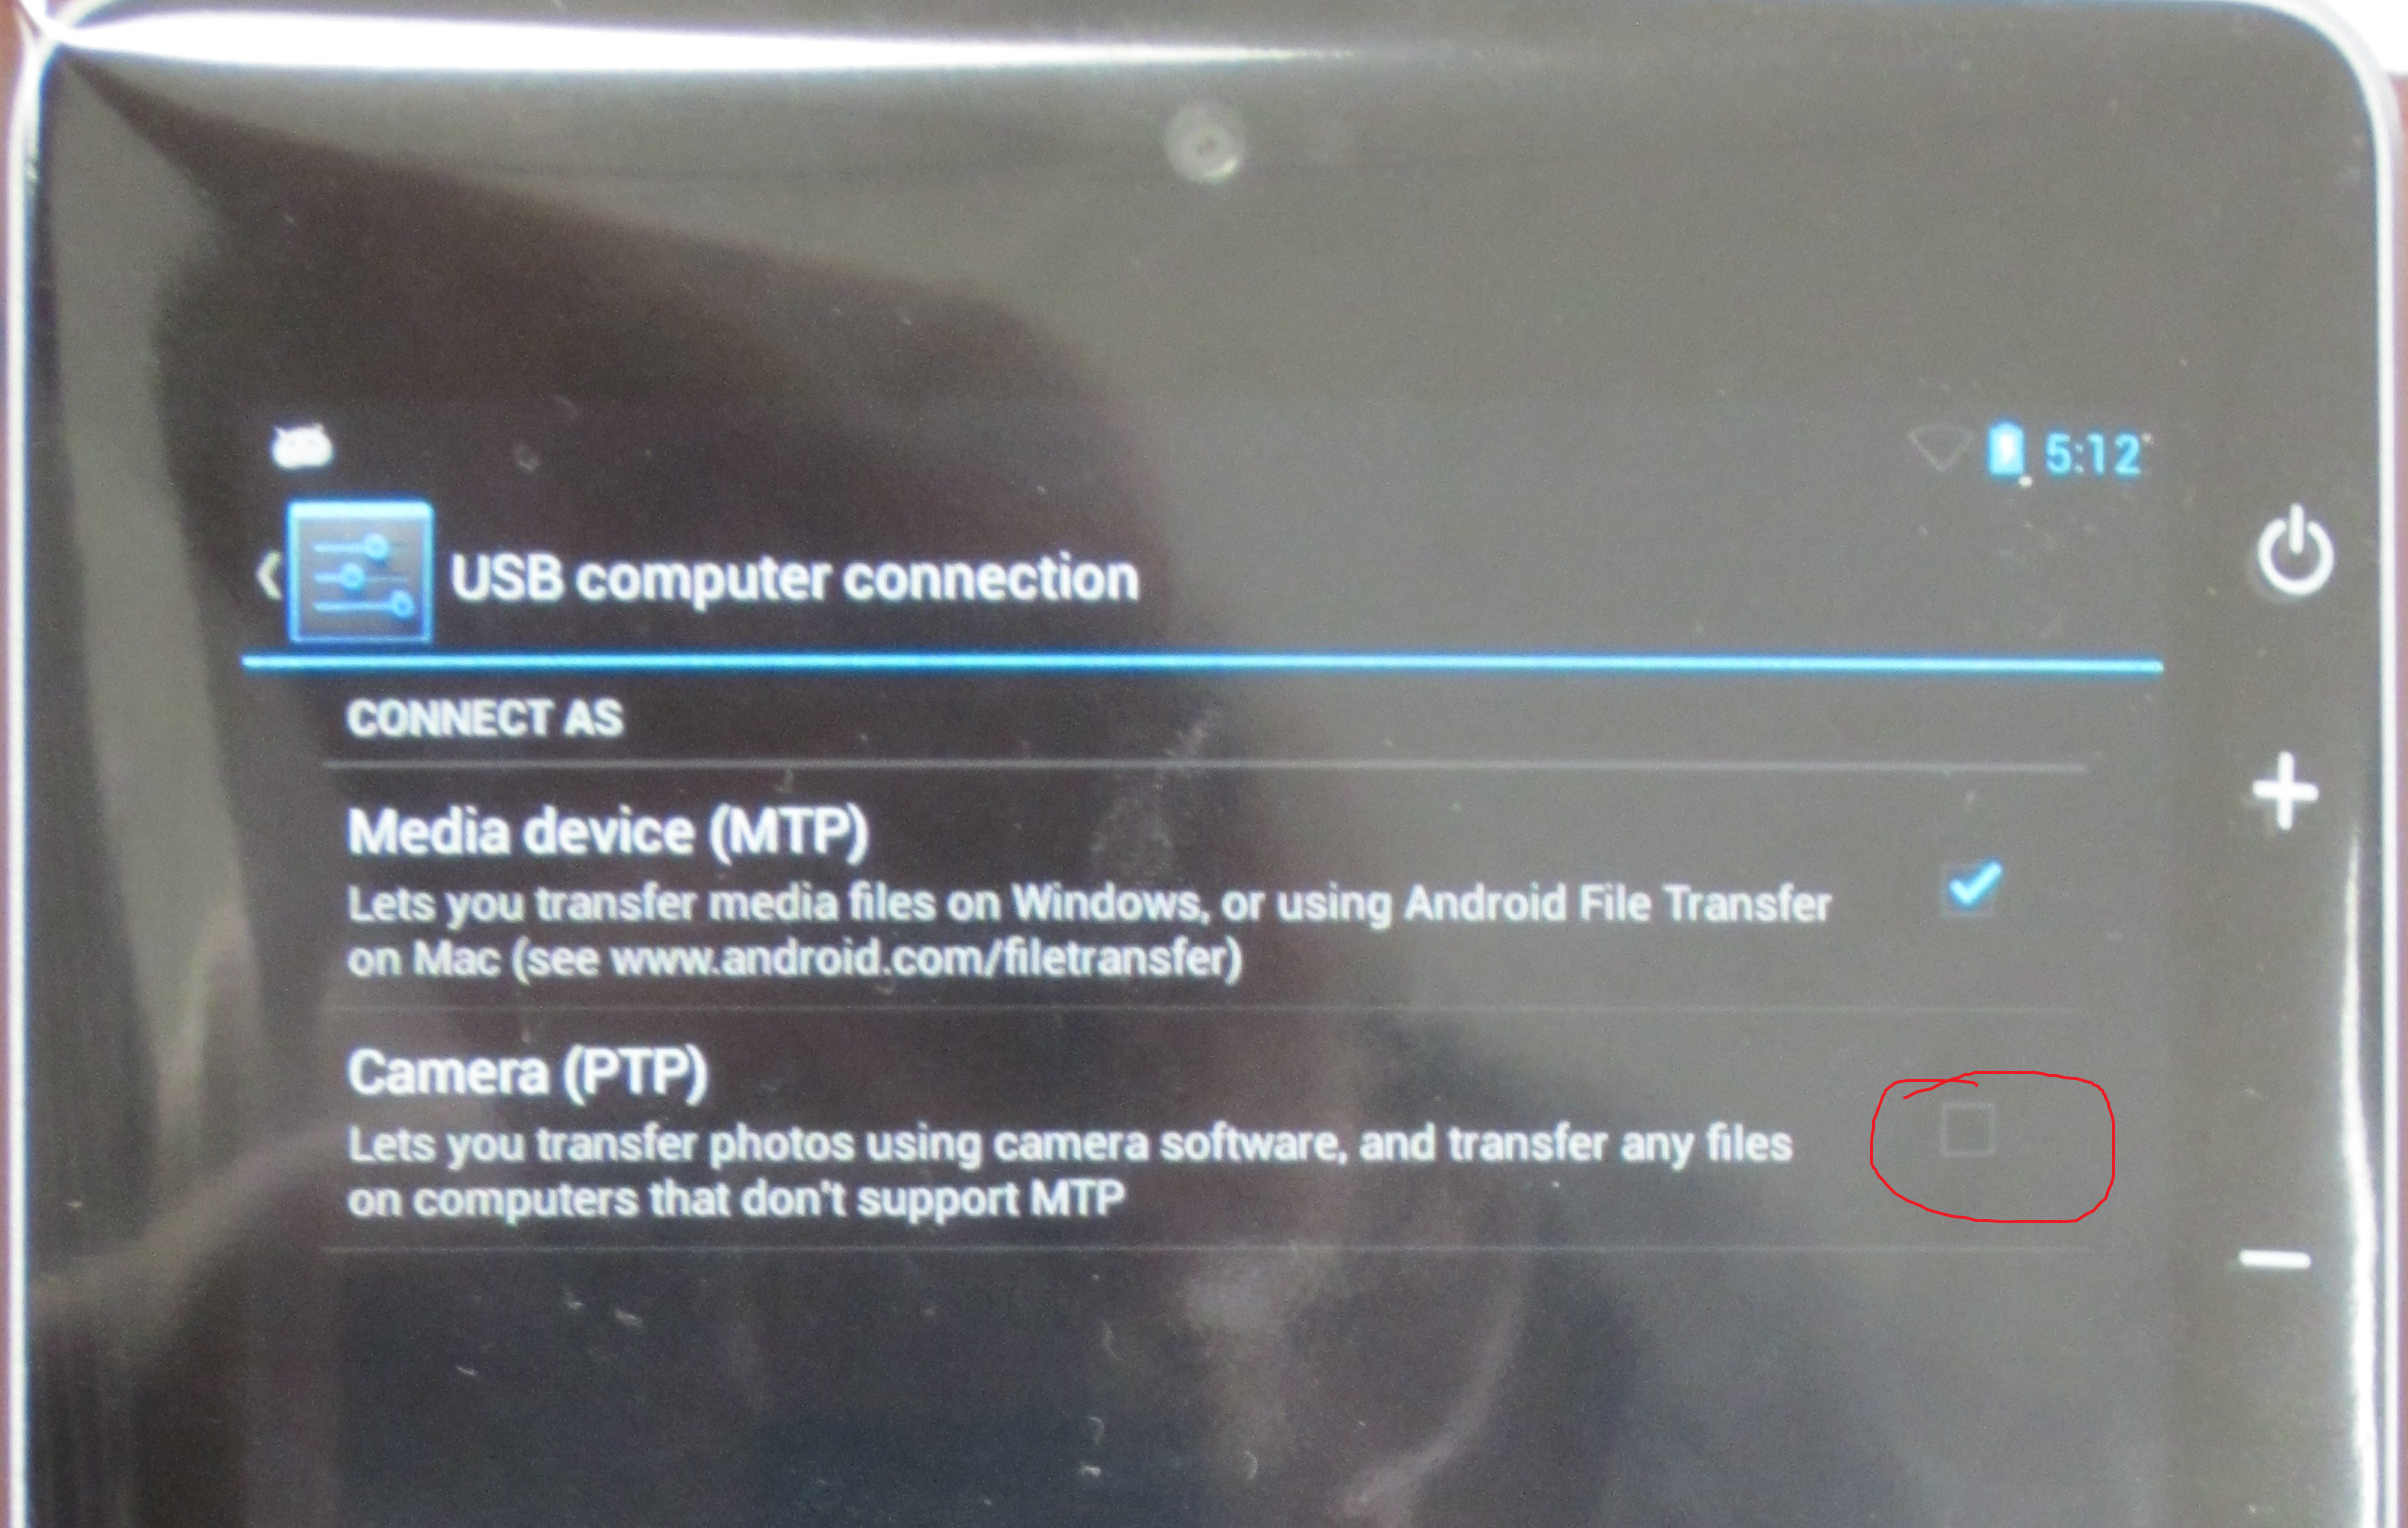
- To change the USB connection setting from “connected as media device” to “connected as camera”, tap on “connected as media device”, you will see a list of two types of USB connection settings as shown below.

- Tap on the check box next to “Camera (PTP)” to select “connect as camera”. Tap on “Home” button, repeat step 4. You should see that the device is “connected as camera”, as shown below.


Install the USB driver
- Log in to a Window machine using a system administrator account.
- Download the USB driver for Nexus 7 tablet from below and save it. Make sure you note where the file is saved.
- USB driver for Nexus 7 tablet on VSU server. You can also download it from Asus’s website.
- The downloaded file is a Zip package. Unzip the Zip package to a folder, by default, the folder is “usb_driver”. Be aware that you must unzip the package to a folder rather than “open it”, typically by double-clicking on it.
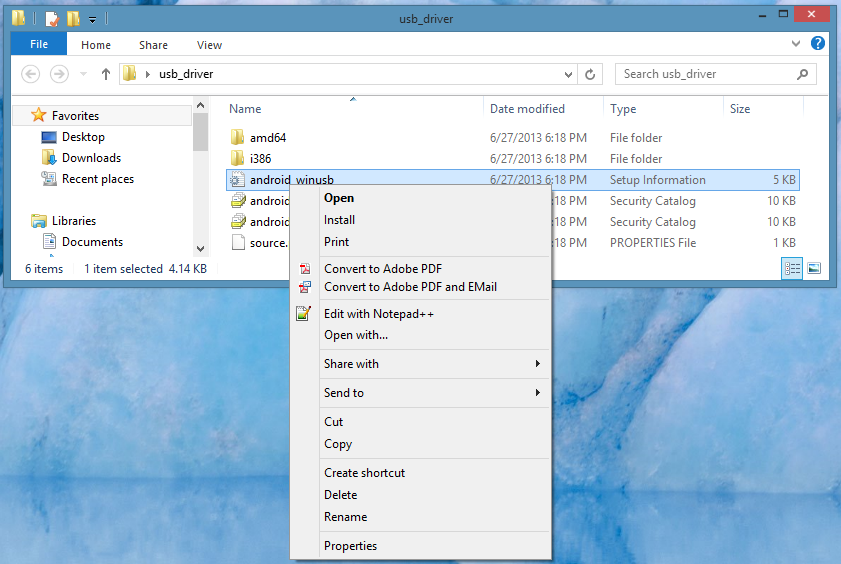
- Open the folder and locate the file “android_winusb.inf”. Note that the extension “.inf” may not shown as a result of your Windows configuration.
- Right-click on the file and a pop-up menu will appear as shown below. Click on “Install” to install the driver.
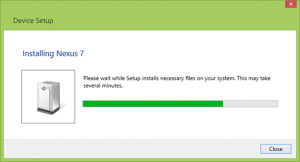
- Connect the tablet to the Windows computer. If the driver is properly installed, a window will pop up to indicate that the software for the device is being installed.
Test the device
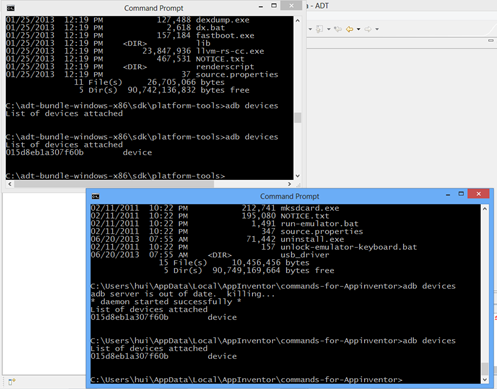
- On the Windows machine, locate tool “adb”. If you installed the App Inventor Setup software, the adb tool is either at “\Users\Your_User_Name\AppData\Local\AppIventor\commands-for-Appinventor” or at “\Program Files (x86)\AppInventor>cd commands-for-Appinventor”. If you are using Android Development Toolkit, the adb tool is located at “sdk\platform-tools” under the Android Development Toolkit.
- Then run the adb tool as follows,
adb devices
You should now the list of Android devices attached, which indicates that the computer successfully connected to the tablet and is ready for development. See an example below.
Android 4.2.2
If you upgraded Android on the tablet to version 4.2.2, you may observe that the computer cannot connect to the devices any more. It is in fact a result of an ongoing RSA verification process on the tablet.
Issue the command “adb kill-server” followed by the command “adb devices”. Take a look at the tablet and you will see a pop-up window ask for for a security verification for verifying the connecting computer’s identity. See an example below.
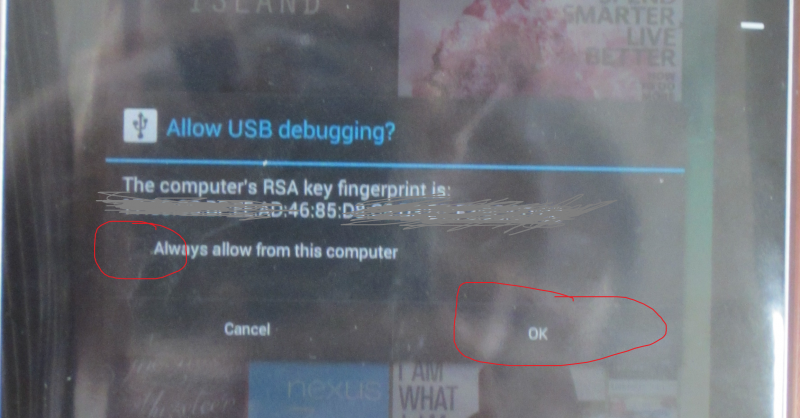
After you click the “OK” button and accept the connecting computer as a valid computer, the computer should be able to connect to the device. However, the issue may arise again. To avoid the problem for the future, check “always allow from this computer”. Note that you may have to repeat this procedure if you change to a different computer.
In addition, the adb tool that comes with App Inventor may be too old. You can download a recent version of the adb tool and replace the one in the App Inventor Setup software folder with the downloaded one